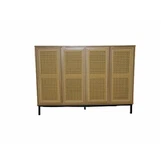
Hey there! As a supplier of wooden drawers, I've seen firsthand how a simple handle can transform the look and functionality of a drawer. In this post, I'm gonna walk you through the process of adding a handle to a wooden drawer. Whether you're sprucing up an old piece of furniture or customizing a new one, these steps will help you get the job done right.
Why Adding a Handle Matters
First off, let's talk about why adding a handle to your wooden drawer is a big deal. Handles aren't just for show; they serve a practical purpose. They make it easier to open and close the drawer, especially if it's heavy or full. Plus, they can add a touch of style to your furniture. A well-chosen handle can complement the design of your wooden drawer and enhance the overall aesthetic of the room.
Tools and Materials You'll Need
Before you start, gather the following tools and materials:


- Wooden Drawer: Of course, you need a wooden drawer. You can check out our Wooden Drawer options if you're in the market for a new one.
- Handle: Choose a handle that suits the style and size of your drawer. There are all kinds of handles available, from simple knob-style to more elaborate pulls.
- Screwdriver: A Phillips or flathead screwdriver, depending on the type of screws that come with your handle.
- Measuring Tape: To ensure you place the handle in the right spot.
- Pencil: For marking the screw holes on the drawer.
- Drill (Optional): If your drawer doesn't have pre-drilled holes for the handle, you'll need a drill and the appropriate drill bit.
Step 1: Measure and Mark
The first step is to decide where you want to place the handle on the drawer. This is important because it affects both the look and the functionality of the drawer. Here's how to do it:
- Center the Handle: If you're using a single handle, measure the width of the drawer front and find the center. Mark this point with a pencil.
- Determine the Height: Decide how high you want the handle to be from the bottom of the drawer. A common height is around 2 to 3 inches, but it depends on your personal preference and the size of the drawer. Mark this height on the center line you just drew.
- Mark the Screw Holes: Look at the handle and measure the distance between the screw holes. Transfer these measurements to the drawer front, using the center mark as a guide. Mark the screw holes with a pencil.
Step 2: Drill the Holes (If Necessary)
If your drawer doesn't have pre-drilled holes for the handle, you'll need to drill them yourself. Here's how:
- Choose the Right Drill Bit: The size of the drill bit should match the size of the screws that come with the handle.
- Drill the Holes: Place the drill bit on the pencil marks and drill slowly and steadily. Make sure the holes are straight and the same depth.
Step 3: Attach the Handle
Now it's time to attach the handle to the drawer. Here's how:
- Align the Handle: Place the handle on the drawer front, aligning the screw holes on the handle with the holes you drilled or marked on the drawer.
- Insert the Screws: Insert the screws through the holes in the handle and into the holes in the drawer. Use the screwdriver to tighten the screws, but be careful not to overtighten them, as this can damage the wood.
Step 4: Test the Drawer
Once you've attached the handle, test the drawer to make sure it opens and closes smoothly. If the handle feels loose or wobbly, tighten the screws a little more. If the drawer doesn't open or close properly, check to make sure the handle is installed correctly and that the screws are tightened evenly.
Tips and Tricks
- Choose the Right Handle: Consider the style and size of your drawer when choosing a handle. A small drawer might look better with a simple knob, while a larger drawer might need a more substantial pull.
- Use a Template: If you're installing multiple handles on a set of drawers, use a template to ensure they're all placed in the same position.
- Sand the Edges: Before attaching the handle, sand the edges of the drawer front to remove any rough spots or splinters. This will give the handle a smooth surface to attach to.
- Match the Hardware: If you're adding handles to a piece of furniture that already has other hardware, such as hinges or knobs, try to match the style and finish of the new handles to the existing hardware.
Other Drawer Options
If you're looking for more drawer options, we also offer Four Drawer Locker and Office 6 Drawer Cabinet. These are great for storing all kinds of items, from clothes to office supplies.
Conclusion
Adding a handle to a wooden drawer is a simple and rewarding DIY project that can make a big difference in the look and functionality of your furniture. By following these steps and using the right tools and materials, you can easily add a handle to your wooden drawer and give it a fresh new look.
If you're interested in purchasing wooden drawers or other storage solutions, feel free to reach out to us for a quote. We'd love to help you find the perfect products for your needs.
References
- Woodworking for Beginners: A Guide to Basic Woodworking Techniques.
- Home Improvement Handbook: Tips and Tricks for DIY Projects.