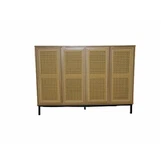
Hey there! As a storage cabinet supplier, I often get asked about how to assemble these handy pieces of furniture. It might seem like a daunting task at first, but with the right steps and a bit of patience, you'll have your storage cabinet up and running in no time. In this blog, I'll walk you through the process, using some of our popular products as examples, like the Storage Cabinet with Doors, Wooden Drawer, and Plate Type 8-Drawer Cabinet.
Step 1: Gather Your Tools and Parts
Before you start assembling, make sure you have all the necessary tools and parts. Usually, you'll need a screwdriver (both flathead and Phillips, depending on the cabinet), a hammer, and maybe a rubber mallet. Check the instruction manual that comes with your cabinet to see if there are any special tools required.
Open up the box and lay out all the parts. It's a good idea to sort them by type and size. This will make it easier to find what you need as you go along. Look for any hardware packets, which usually contain screws, nuts, and bolts. Make sure you have all the pieces listed in the manual. If something is missing, don't hesitate to contact us.
Step 2: Read the Instructions
I know it might be tempting to skip this step, but trust me, reading the instructions is crucial. Each cabinet is different, and the assembly process can vary widely. The instructions will give you a clear idea of how the cabinet is supposed to go together, and they'll often include diagrams to help you visualize the steps.
Take your time to go through the instructions from start to finish. Make note of any special steps or warnings. If there's something you don't understand, don't be afraid to reach out to our customer support team. We're here to help!
Step 3: Assemble the Base
For most storage cabinets, the first step is to assemble the base. This usually involves attaching the side panels to the bottom panel. Look for the pre-drilled holes in the panels and align them carefully. Insert the screws and tighten them with your screwdriver. Don't over-tighten the screws, as this can strip the holes or damage the wood.
If your cabinet has adjustable feet, now is the time to install them. These feet help to level the cabinet and prevent it from wobbling. Use a level to make sure the base is perfectly flat and level. This will make the rest of the assembly process much easier.


Step 4: Attach the Back Panel
Once the base is assembled, it's time to attach the back panel. This panel provides stability to the cabinet and helps to keep it upright. Align the back panel with the edges of the base and side panels, and then insert the screws. Make sure the back panel is flush with the edges of the other panels.
Some cabinets have a pre-attached back panel, which can make this step even easier. Just make sure it's properly aligned and secured.
Step 5: Install the Shelves
If your cabinet has shelves, now is the time to install them. Look for the shelf supports, which are usually small brackets or pins. Insert the shelf supports into the pre-drilled holes in the side panels. Make sure they're evenly spaced and level.
Place the shelves on top of the supports and make sure they're sitting securely. If the shelves are adjustable, you can move them up or down to suit your needs. Just make sure the shelf supports are properly installed in the new locations.
Step 6: Attach the Doors or Drawers
If your cabinet has doors or drawers, this is one of the most important steps. For doors, start by attaching the hinges to the side panels of the cabinet. Make sure the hinges are properly aligned and screwed in tightly. Then, attach the doors to the hinges. Use a level to make sure the doors are hanging straight and evenly.
For drawers, you'll need to install the drawer slides. These slides allow the drawers to open and close smoothly. Follow the instructions in the manual to attach the slides to the side panels of the cabinet and the sides of the drawers. Then, insert the drawers into the cabinet and make sure they're gliding smoothly.
Step 7: Add the Finishing Touches
Once the cabinet is fully assembled, it's time to add the finishing touches. This might include attaching the handles or knobs to the doors and drawers. Use the provided screws to attach the handles securely.
You can also clean the cabinet with a damp cloth to remove any dust or debris. This will give your cabinet a nice, clean look.
Step 8: Check for Stability
Before you start using your cabinet, it's important to check for stability. Give the cabinet a gentle shake to make sure it's not wobbling or moving. If it is, check the screws and make sure they're all tightened properly. You might also need to adjust the feet to level the cabinet.
If you're still having trouble with stability, don't hesitate to contact us. We can provide you with some additional tips or send someone out to help you.
Step 9: Customize Your Cabinet
Now that your cabinet is assembled, you can customize it to suit your needs. You can add some decorative items, like baskets or bins, to the shelves. You can also paint or stain the cabinet to match your decor.
If you have any special storage needs, like storing tools or clothing, you can install some additional features, like hooks or racks. Just make sure you're not overloading the cabinet or damaging it in the process.
Step 10: Contact Us for More Help
If you run into any problems during the assembly process, or if you have any questions about our products, don't hesitate to contact us. Our customer support team is available to help you 24/7. We can provide you with additional instructions, troubleshooting tips, or even replacement parts if needed.
We're also here to talk to you about your storage needs and help you find the perfect cabinet for your home or office. Whether you're looking for a Storage Cabinet with Doors, a Wooden Drawer, or a Plate Type 8-Drawer Cabinet, we have a wide range of options to choose from.
So, if you're interested in purchasing a storage cabinet from us, or if you have any questions about our products, please feel free to reach out. We look forward to hearing from you and helping you with all your storage needs.
References
- General knowledge of storage cabinet assembly techniques.
- Instruction manuals of our storage cabinet products.